Photo editing has become an integral part of our daily lives. If you’ve ever used the Facetune mobile app to enhance your portrait shots, you’ve probably appreciated its skin correction, teeth whitening, and other enhancement capabilities. However, many users prefer to work on a PC where they have access to more powerful tools and a larger screen.
In this article, we’ll look at how to use an analog of Facetune for Windows to edit and enhance portrait photos. You’ll learn how you can use PhotoWorks and its tools to correct skin imperfections, whiten teeth, and otherwise enhance your portraits. Below you’ll find a step-by-step guide to help you master the editing process, as well as before-and-after examples so you can see real results. Follow our guide and your portrait photos will look better than ever!
Step 1. Install the Program and Upload a Photo
To get started, you need to download the program and open your photo in it. Below, we will show the most popular retouching tools and explain how to use them to get the best result.
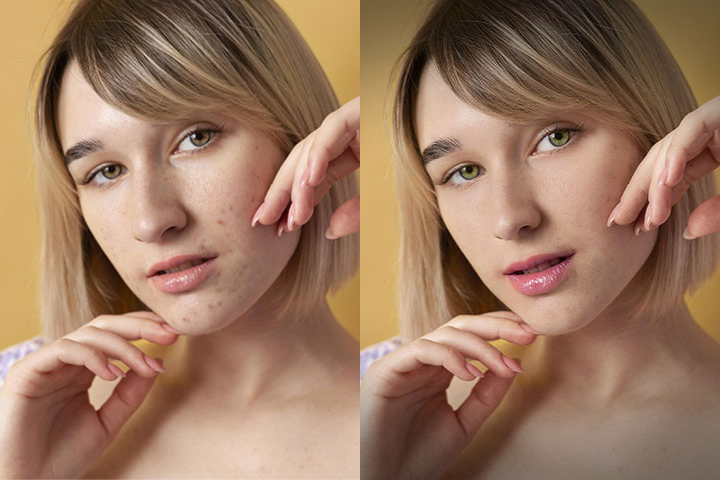
Step 2. Retouch Skin
First switch to the Retouch tab and select either the Portrait Magic tool or the Skin Defects Removal tool. The first tool is better to use when there are minor blemishes that you need to correct. The tool has a gallery of ready-made presets that allow to remove face shine, smooth skin, whiten teeth, make overall enhancement, etc. You can apply the tool for just the face, or the face and neck. Also, you can control the strength of the applied preset by dragging the slider below the picture. If you want to have more manual control – switch to the custom presets and make the changes to skin and skin tone, eyes, eyebrows, lips, and teeth manually by adjusting the sliders. Apply the changes.
The second tool is best when the skin has major imperfections and wrinkles. If you applied the tool and some blemishes still remain, remove them manually with the Brush tool.
Step 3. Correct Face Shape & Apply Makeup
In PhotoWorks, you can also adjust your eye shape, lips, nose, eyebrows, and the rest of your facial features. To do that, select the Face Sculpt tool under the Retouch tab. For each facial feature, adjust the slider position to make it bigger or smaller. You can also use this tool to add a smile to your photo, adjust the curve of your eyebrows, and correct the oval of your face. If you want to change the eye or hair color or apply some tint to the lips, you can easily do it with the help of the Adjustment Brush.
Step 4. Apply filters and Effects
Filters and effects allow you to add artistic elements to portraits, emphasizing the style and mood of the image. In PhotoWorks, you can choose from a variety of filters that can be customized to suit your individual preferences. Under the Tools tab, you can use advanced color correction with curves and 3D Lut, add a vignette, or make an image overlay. Under the effects tab, you can transform your portraits in a click with the ready-made effects that are divided into categories for your convenience – popular, vintage, lighting, photographic, and others. If you wish you can add a radial or gradient filter to your picture or even change the backdrop in mere minutes.
Summary
PhotoWorks offers a wide range of tools and features comparable to Facetune. With a variety of editing features, you can easily improve the quality of your photos and create the perfect portrait. Whether you use PhotoWorks or other tools, keep in mind that editing should be balanced and natural. The goal is to emphasize the model’s natural beauty, not to change it beyond recognition. Remember, practice and experimentation will help you improve in the art of editing and creating breathtaking portraits that will delight you and your viewers. Good luck on your creative journey!